How to Create a Seamless Pattern (Basic)
I’ve been making a lot of seamless patterns lately thanks to the addition of wrapping paper and lampshades over at Zazzle. I’m no stranger to them. I’ve worked as a wallpaper designer in the past and I can practically do them in my sleep. For some however, creating one doesn’t seem so simple.
There have been a lot of cries for help from fellow Zazzlers and I’ve also seen a few wrapping paper designs already in the Zazzle marketplace which aren’t going to repeat properly. I’m not going to name and shame out of respect, but what I am going to do is show you how to create a seamless pattern using Photoshop, GIMP or equivalent program.
Why make a seamless pattern tutorial?
Everyone has their own way of doing the same thing. This is the method that I use and it can be used by fellow Zazzlers venturing in to the seamless world or by anybody else that fancies having a go.
For this tutorial I will be using a tree from the Vector Trees Pack created by Pinkonhead. The pack is completely free to download and can be used for both personal and commercial projects.
Getting Started
Please note: I will be using Photoshop (Windows) shortcuts and jargon for this tutorial. Most are universal but please remember to translate to your program of choice.
First things first, we need to create a new document (Control+N). You can make it any size you like as long as it’s square. Mine is 800 x 800 pixels.
This will be your design area so colour it with any colour you fancy. I’ve chosen a nice shade of green (#a7b693) to compliment the tree I’m using.
Open the design element you’ll be using as your pattern. Let’s get started!
Step One: Find the centre
For this really basic pattern the first thing we need to do is find the centre of our design area by using 2 guides. Drag a vertical guide and place it half way along your design area (400px in my case) and then do the same for the horizontal guide. They should intersect one another at the very center of the design area.
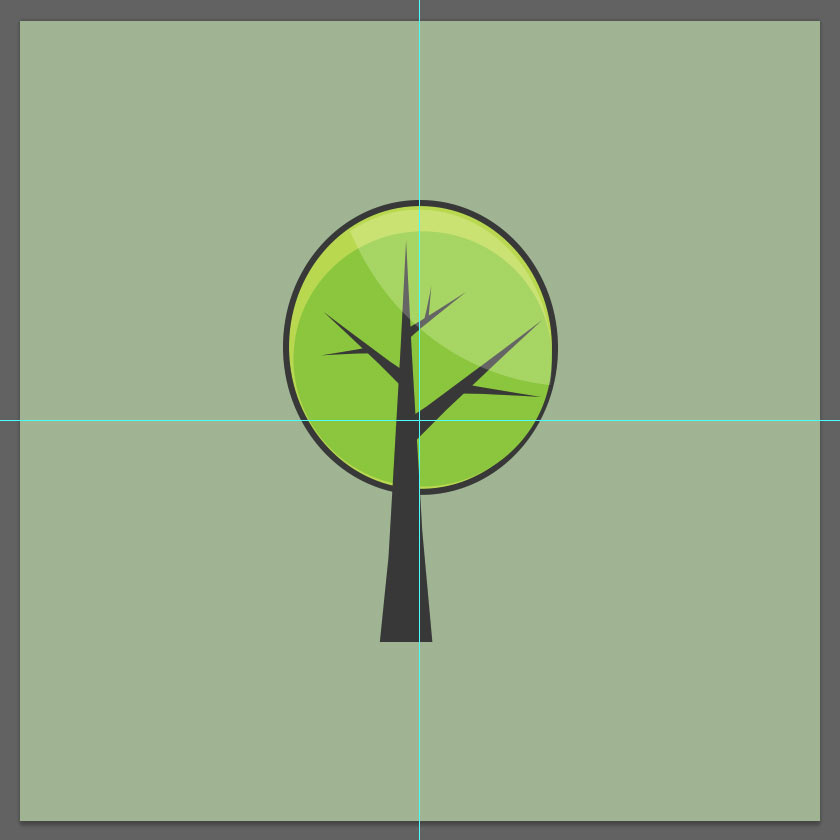
Next, copy and paste the design element that you want to use on to a new layer and place it in the centre of the design area. If you haven’t already, turn on Snap To -> Guides found under View in the menu. This will help you a lot as you’ll find that as you drag the layer around it will snap to the centre itself as you get close.
Step Two: Make a copy
Make a copy of the layer with your design element on. You can do this by copying (Control+C) and pasting in place (Shift+Control+V), or by dragging the layer to the ‘Create New Layer’ icon at the bottom of the Layer Panel.
For the moment, hide the previous layer.
Step Three: Get chopping
You’ll have noticed that the Guides have split the design area up in to four sections. The next step involves chopping the current layer up in to four pieces and positioning them that they repeat seamlessly. Firstly, make sure that the current layer has been rasterized if you are working with a Vector Smart Object.
With your guides still on, use the rectangle marquee tool (M) to select the top left section of the design element. If you drag the marquee from the outside towards the middle, it should automatically snap to the guides. Now cut (Control+X).
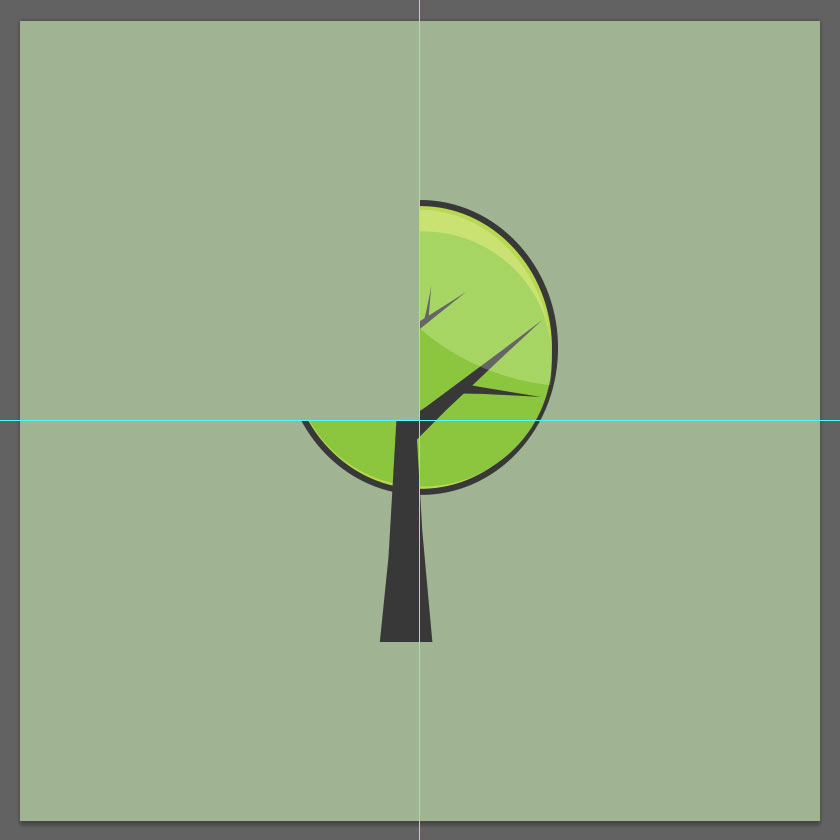
You should end up with something similar to above.
The next thing you are going to do is paste (Control+V) what you have in clipboard, the top corner of your design element, on to a new layer.
Drag the new layer and position it in the bottom right section of the design area so that the bottom and right edges of the partial design element line up with the bottom and right edge of the design area.
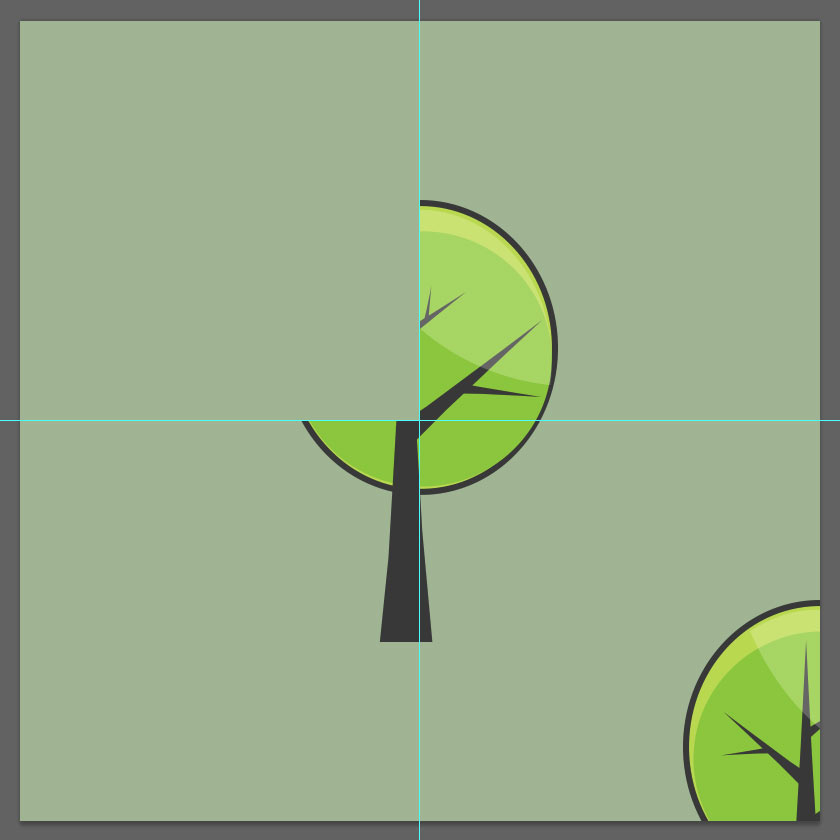
You should now have something which looks like the image above. Go back to the layer which has the top left corner of the design element missing and keep repeating the process until you have chopped your design element up in to four pieces and positioned them correctly. It goes a little like this:
- The top left section of the design element gets positioned so that it’s bottom right corner lines up with the bottom right corner of the design area.
- The top right section gets positioned so that it’s bottom left corner lines up with the bottom left corner of the design area.
- The bottom right section gets positioned so that it’s top left corner lines up with the top left corner of the design area.
- The bottom left section gets positioned so that it’s top right corner lines up with the top right corner of the design area.
I hope that makes sense. If not, use the images to help you.
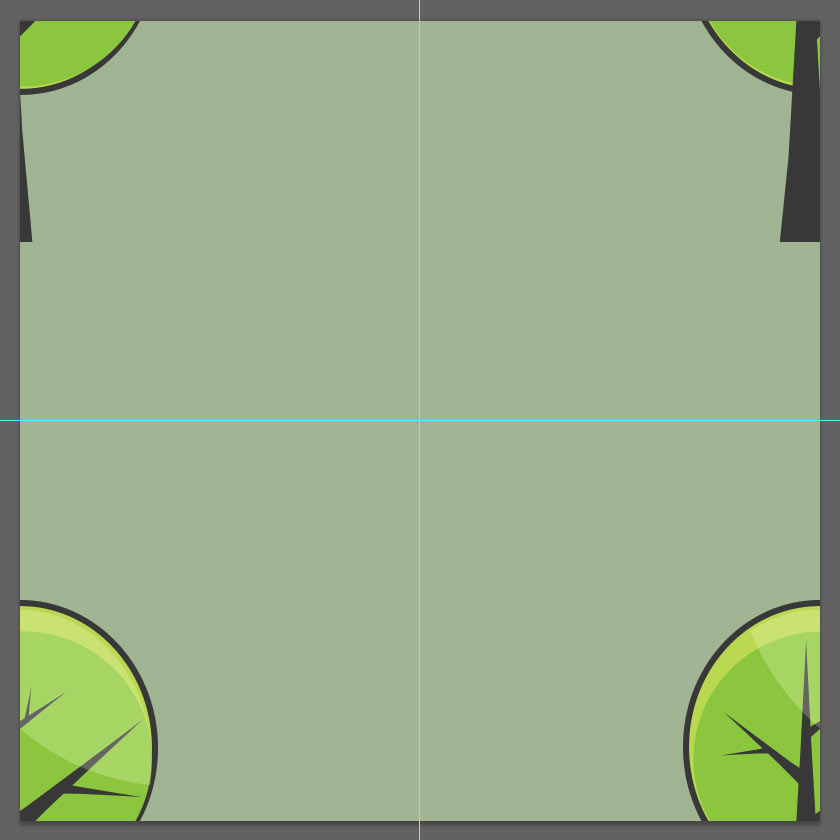
You should have something looking like the image above.
Step Four: Fill in the blanks
What do we do about the empty space in the middle? Remember the layer I told you to turn off at the beginning? Turn that back on.
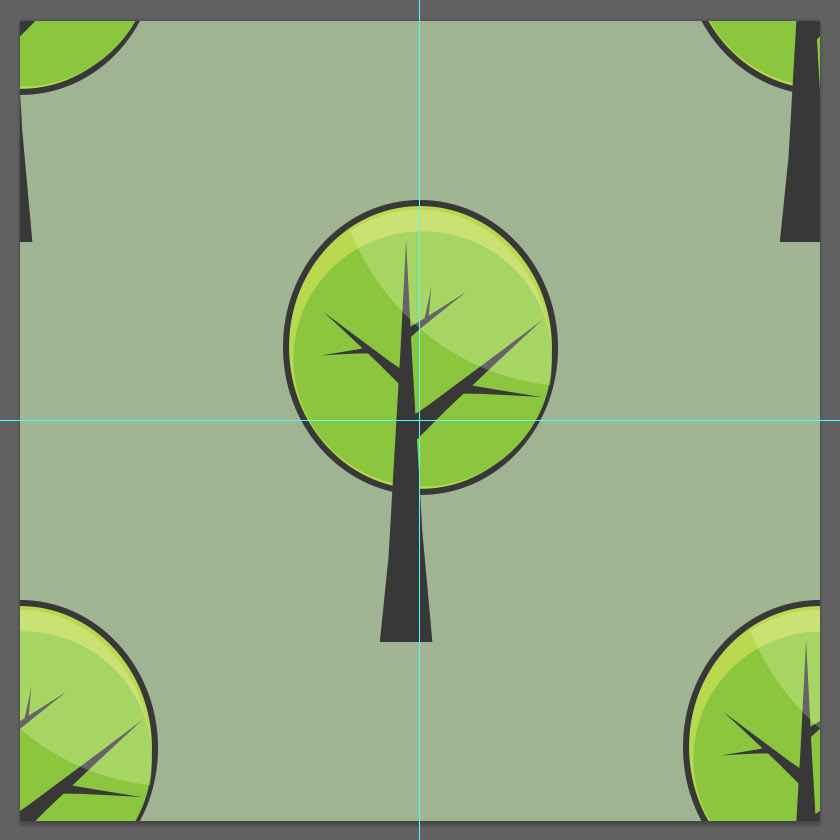
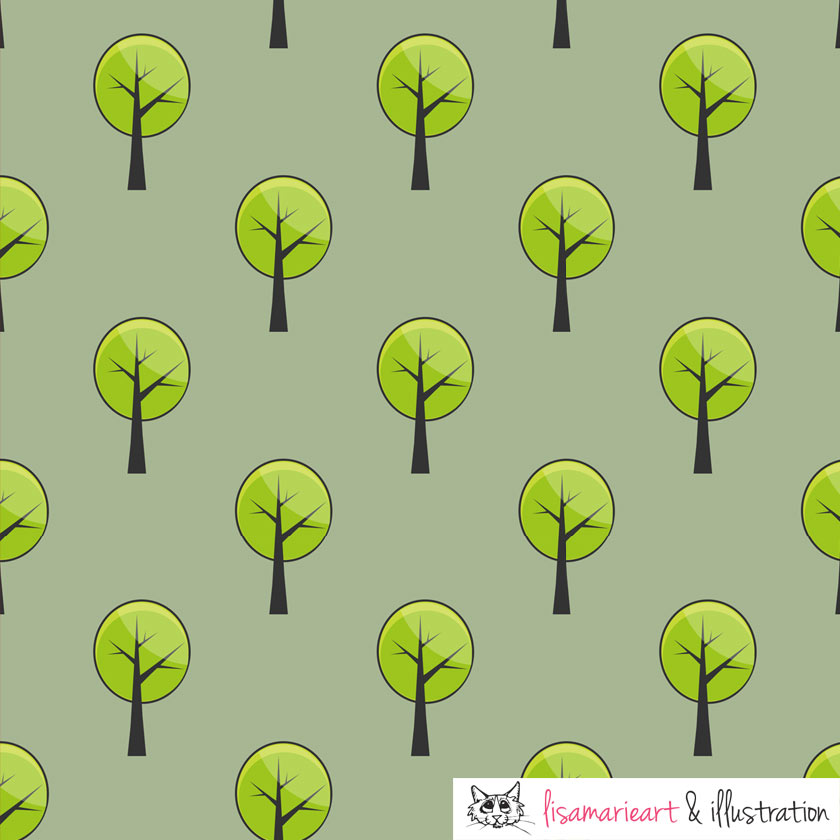
Your seamless pattern is complete.
Step Five: Check your work
The last thing you should always do is check your work. I used to do repeats for a living and even I manage to mess them up from time to time. The best way to do this is to copy and paste your pattern in to a new document a few times to create a few identical layers. Next, see if the right edge of one layer perfectly aligns with the design on the left edge of another layer, then check the top and bottom align.
You’re looking to see if when the edges come together the 4 partials make a whole again. So in my case, bringing the edges together will recreate the tree.
This is only a very basic seamless pattern but the same principals apply for complicated ones. In my next tutorial I’ll show you how to make a slightly more complicated pattern using several differently shaped trees.
Happy creating!